Showing posts with label Nursery. Show all posts

Thursday, September 19, 2013

Ready For Baby ?!

With it really feeling like crunch time around here, we've been super productive getting ready for baby.  This past weekend, we finished the nursery, babified the car, packed the hospital bag, and even decided on a name (but you still have to wait for the name until she's born)!  All that's pretty much left now is finishing up a few crafts I have planned, cleaning the house, and waiting for her to make an appearance!

I feel like we've been working on her nursery for forever.  I looked back and did the math, and it's taken a total of 9 months to go from a "catch all" room, to a beautiful nursery! It took a lot of hard work to strip the wallpaper (for an awesome bonus on this post, read the comments section and see who contacted me - awesome!), prep the walls, paint, remodel furniturefigure out the furniture, and finally decorate!  I just love walking by the room and can't imagine what it'll be like when a little baby is sleeping in that crib.


The Nursery Before:

(When we moved in, we referred to this room as "the office".  But it actually became more of a catch all room.  For the longest time, it held all the boxes that needed unpacked, and then slowly transformed into this chaos.)

(I had visions of this room being a little crafting area that I could utilize and even watch tv in it.  However, I could only watch VHS movies in here (we own like 5), and then everything got thrown in this room.  So it sat like this for way too long, until I finally decided it was time to prep for a baby.  I started cleaning out the room and then stripping the wallpaper in late fall/winter of 2012 and found out I was pregnant with Bean in January 2013!)


The Nursery Complete:

(I can't believe the before and after pictures.  All the hard work was totally worth this beautiful space!)

(I am not one to do hodge podge decoration.  I wanted to pick out a complete nursery decor & bedding set and just use that to fill the nursery.  However, Steve wanted it to be more unique and use items from all sorts of different things.  He pretty much found the stuff, and I executed the vision.  This picture came from Ikea and the bedding is from Potter Barn - thanks to our Steve's amazing Craigslist find!)

(I take sole ownership of this beauty - okay, inspiration came form Pinterest.  How did people accomplish things without Pinterest?!  I first used chalk to draw the tree up on the wall.  It took me a few different tries, but finally got the tree I wanted.  Then I painted it - which was pretty scary because it would take a lot of work to try to fix a mistake or even scrap the whole project with the brown being so dark.  Last, I painted little bird house and Steve attached them to the wall.  Check out the owl on the left!  That is the actual owl that lives in our backyard.  A bird nursery for our little girl wouldn't be complete without our favorite bird to watch and listen to!)

(This is where she and I will be spending lots of snuggle time while reading & rocking.  It's hard to see, but check out that sweet little mobile up in the corner.  This hand cut bird mobile came form the shower that my sweet Lima friends threw for me.  All that cutting was not for vain!)

(Notice there's no dresser in Bean's nursery.  All the storage is in this little cabinet, with a few drawers underneath; the closet; and the baby changing table.  When I organized all her clothes, all the piles and everything made sense.  Now I don't really remember why I put stuff where I did, but as with any new organization, I'll just have to work out the kinks once this is all in use!)

So we're all ready, and now we wait!  We thought maybe she was going to make an early appearance but now it's looking like it's going to take awhile longer.  After my last doctor's appointment (I go weekly), we learned that there is definite progression being made -- Ahhhhhh!!  It's crazy that any day now, we could be holding our daughter!  Emotions (especially terror, haha) are running high around here.  I'm a definite planner and it kills me to not be able to know when it's going to be the real deal and time to head to the hospital.  I'm trying to enjoy these last few weeks (or days?!) of baby poking around inside me and life as I know it, but I'm going crazy with anticipation.

Tuesday, August 13, 2013

Nursery Storage

The Closet:

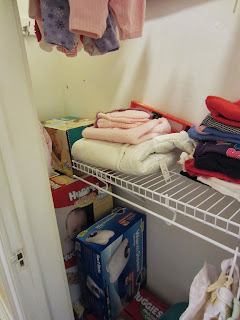
The closet in the nursery was a problem area for us.  It has a really weird layout which results in wasted space.  It's about 2.5 feet deep and about 6 feet long.  That sounds like a lot of space, but when the door frame is about 3 feet wide, it makes for some awkward space.

Originally, the closet just had a metal rod that ran the whole length with a weird particle board type shelf laid on top of the brackets.  It was really hard to reach items that would hang on the rod all the way to the left and right inside the closet.  It was also awkward to reach stuff on the shelf; plus, the shelf was not secure properly!

(Unfortunately, we didn't take a better before picture than this one and this isn't even our stuff!  Before we bought the house, I snapped this picture of the closet from the previous little girl who lived here.)

We threw around several different ideas on how to best utilize the space and finally decided that no matter what we did, there was going to be some wasted space on the sides.  So we decided to go with a double shelf that was just a little bigger than the door frame.  That way, we could still reach all the clothes.

(Our new 2 shelf system!  Steve did an awesome job installing the new racks :)!  He got good use out of his hammer drill, as the closet wall shares the backside of the chimney.  Look at all those cute baby clothes.  I have finally been able to go through all our gifts, launder everything, and organize it the way I want it!)

(We're using the awkward space on the left side to store all the boxes of diapers and wipes we've gotten!  Hard to believe that we'll use all those diapers!)

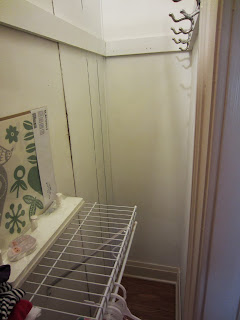
(The right side awkward space is still empty.  I have some storage drawers that I may put over there, but they won't be easily accessible. So we'll see what happens over here.  Might put something like our suitcases there - haha!)

The Cabinet Insert:

This room has a cool built-in cabinet feature that I absolutely love.  The first time I saw it, I immediately knew this room would be a nursery and I'd store all sorts of baby items in it.  When I was re-doing the room and painting all the trim.  I was trying to decide whether or not the cabinet needed repainting on the inside.  Upon further inspection, I realized it was painted over contact paper that was peeling.  So I decided to take out all the contact paper and repaint it.

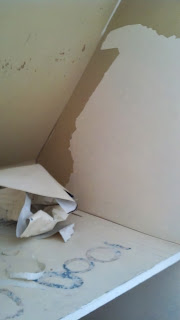
(Peeling off all the old painted contact paper -- the lighter part stuff.  The actual cabinet was in good condition, just needed some repainting!)

(It's really hard to see, but the inside panels of the cabinet doors had contact paper on them, too.  It was a light blue flower pattern that was painted over with the cream color.  The contact paper on the doors was probably the hardest area to work on, but I got it all off eventually.)

(Now it just needs paint!) 

(Ta-Da!  A brand new cabinet built-in!  It is now packed with baskets of socks, stacks of bibs, and stacks of pjs. We've opted not to have a separate dresser in her bedroom.  I think between the storage in the cabinet insert, built in drawers -- not pictured, under cabinet -- and the new storage in the closet, that a dresser would just be too much.  Oh and we have that amazing baby changing table with drawers and cabinet space, too!)


These last few storage places completed the nursery transformation . . . almost!  We have some fine tuning and decorative details to add.  I'm hoping to get it 100% done in the next week or two.  A lot of progress has been made in the past couple weeks and I'm finally feeling more excited for Bean's arrival and less stressed.  Although, I'm still pretty stressed over the physical arrival, but who is ever fully ready for that??

Saturday, August 10, 2013

Changing Table Re-Do

I thought my sister was crazy when she said, "Let's re-do the baby changing table!  I'll strip the finish off for you in no-time!"  Okay, I knew my sister was crazy way before that statement, but I didn't think she could strip the finish off in 2 days.  Plus, I wasn't sure if I was willing to take on such a big undertaking this late in the pregnancy.  But boy am I ecstatic at the "new" changing table!  Definitely worth all the effort and money!

For about $50 and a week's worth of hard work (and help!), we have what looks like a brand new white changing table for Bean!  The changing table was originally purchased back in 2003 for around $400 for my sister before her oldest daughter was born.  She used that changing table for all 3 of her girls meaning the piece was well used and loved.  Last fall, they went through all their baby items and decided it was time to get rid of them all, meaning Steve and I got dibs on what we wanted.  I immediately said yes to the table, but didn't really confirm that with Steve -- oops :-).

Boy was he surprised when that beast showed up.  It's built of solid oak and is very sturdy (which really translates into heavy!).  My brother-in-law and Steve had to carry it up to our second level which secured its place in our home.  There was no way it was ever going to come back down in 1 usable piece (unless a professional mover is doing it!).  That piece of furniture quickly became a "source of contention" between us - haha.  It wasn't necessarily a sentimental thing, but more for the fact that we got a very usable and sturdy piece of furniture for free.  Steve on the other hand didn't like its finish (even though it matched the wood floor) and just saw it as a bulky eye sore.

Once we started pulling the nursery together, we decided to go with white furniture to not over-shadow the wood floor.  However, it was too late to try to re-do the changing table since I had other things going on like wallpaper removal, painting, oh yeah, and being pregnant!  I had accepted that the changing table would remain as it was and we'd just make it work in the room.  Steve was still hoping he could take a sledgehammer to it and make it go away.

I never even thought about a chemical stripper to take the finish off (since there was no way I was going to sand off the finish in that room.  I remember the previous sanding catastrophe that happened in the nursery and didn't want another.  After getting advice about using a chemical stripper from others and my sister's willingness to get the job done, there was no turning back on the project!

We bought our supplies for the project -- chemical stripper, mineral spirits, tarp, sand paper, & masks--headed back home, and Amber quickly went to work.  You were supposed to paint a layer of the chemical on, let it sit 30 minutes, then scrape off the finish.  In theory, Amber was going to come play dolls with me and the girls (since I wasn't allowed to mess with the chemical, I was on niece duty) while the chemical set; however, she soon realized that you didn't really need to wait the full 30 minutes.  So she just set to work on painting and scraping continuously.  I wish we had kept better track of how many hours it took her to get the job done, but by the next evening, all the pieces were in their raw state!

After stripping the finish, she had to wipe it all down with the mineral spirits, then do a light sanding to get stubborn varnish spots off, and then washed it with soap and water.  When she left, all I had to do was paint it white & put a clear coat on it -- easy enough!  It took me a couple days of painting it all white, and then another couple days for the clear coat.  Steve helped out with the clear coat as well so that I wasn't over-exposed to chemicals -- thanks Steve!

To finish it all up, I used Valspar Ultra paint & primer in 1.  It has No VOC (volatile organic compounds) and no odor!  I was skeptical of the no odor part, but seriously there is none!  If you have color added, there's a little bit of smell, but since I used it as straight white, no fumes!.  After applying 3-4 coats and achieving the look I wanted, we used MinWax ploycrylic semi-gloss to seal it all in.  The polycrylic needed about 3 coats, but you were able to apply coats 2 hours apart - not too bad!

Now we have a piece that matches the nursery beautifully and no longer is a "source of contention".  Okay, maybe it is still a little bulky and Steve isn't as in love with it as I am, but we both agree it goes very well in Bean's room now.  I'll take that compromise!  Only problem for Steve is now there's no way we're getting rid of it after all of Amber's hard work :-). Thanks sister!  We love it :)

(Changing Table before)

(I really had never thought about seriously repainting it, because I felt that taking the varnish off would "ruin" such a "nice" piece of furniture.  But upon closer inspection, I realized this table had been well used and had lots of marks and stains on it.  After discussing with sister about her feelings on the piece, it was a no-brainer to re-paint it the way we wanted -- especially with the help!)

(She was smiling at this point because she still thought it'd be a quick process.  It went quicker than I thought it would, but it required lots of attention and time from her that I don't think she had thought about - haha!)

(All the varnish stripped off!  I deemed the inside not important to worry about.  I ended up buying shelf liner and put it on the inside to cover up the stains on the shelves -- easy peasy!)

(The doors had this flower detail on them which made them "country-ish" in Steve's words.  I could take or leave the design, but since we were doing an over-haul, now was the time to address the issue.)

(I got a wood filler and covered up the design.  After it dried, I sanded it to make it smooth.  I probably should have done this a couple times to assure the design was completely covered, but I was ready to move onto painting.  When you look closely at the doors now, you can see the outline of the design, but from a distance it isn't noticeable so I'm happy.)

(Our "brand new" changing table!  I feel like it looks like a completely different piece of furniture now!  It matches the crib beautifully!  Notice how you can no longer see the design on the doors.  We will probably change out the knobs, too; just haven't gotten to that yet.)

(Another view!  Originally, we put the changing table in this corner so that it was hidden and not a focal point in the room, but after discussing it, we've changed the layout.  Now it sits across from the crib, and we'll put the rocking chair in the corner.  This was Steve's suggestion so that we can look out the window while rocking Bean. We're waiting on our glider to arrive to finalize the layout, then we'll post pictures of the finished nursery -- can't wait!)

Better look at how painting the changing table white really changes the room:

(Before)

(After)

Amazing how just changing its color really updated the piece and changes the whole room.  Love it!

Tuesday, August 6, 2013

Nursery Update

I started working on transforming an extra room into a nursery back in December.  I can finally say I think we're on the homestretch!  In case you aren't up-to-date on the nursery drama, here's the run-down.  What was supposed to be a simple paint-the-room-white in preparation for a baby turned into 3 layers of wallpaper removal, patching a bazillion holes around the room thanks to help, the entire room being primed, and finally putting color on the wall!

We chose to go with a neutral color (yellow) on the wall, even though we waited to pick paint colors until after we knew we were having a girl.  We waited so that we could pick a bedding set/theme and match the color to go with the bedding.  As soon as we found out we were having a girl, we both agreed right away that the theme was going to be birds, but we differed greatly on the bedding decor that we wanted to go with.  After much debate, hours spent rating options on a spreadsheet, and an amazing Craigslist find, we got an excellent deal on a Pottery Barn set that we both agreed on.

We're still working with the layout of furniture (plus, we still need to get a glider/ottoman).  Once we are settled with how the furniture is going to be set-up, we'll then hang up all the different bird artwork that we have collected for Bean.  I also have a special little mural planned, but again, can't put it up until we know the placement of all the furniture.

Here are some pictures of how the room stands as of now:

(The window is behind me looking towards the hallway.  If we keep the furniture in this format, the glider/ottoman will be right where I'm standing.  I may switch the crib & changing table.  Not sure yet.  Decisions. . . Decisions. . . )

(View from the doorway into the nursery.  I found an amazing bird fabric that matched the birds from the mobile perfectly.  I debated on making a valance from the fabric for a window (which is why there's fabric draped up there), but I think we decided the birds on the fabric was too busy and I'll go find something more plain.  I'll probably make a pillow or something like that with the bird fabric-- oh and did I mention I got just under a yard of the fabric for less than $3?!)

(My amazing husband took down the boring white ceiling fan and put up this beautiful chandelier & ceiling medallion.  I had seen some chandeliers in nurseries on pinterest and thought it was a neat idea, but Steve suggested it to me before I could show him some options!  Baby girl is already being spoiled like a princess by her daddy and she isn't even here yet!)

(Pottery Barn decor & our lovely crib.  We got an amazing deal on both things -- bedding from Craigslist & crib from BabysRUs.)

(Close-up of the bird mobile, birds on the crib sheet & decorative quilt.  I'll share a little trick I discovered online about how to set up a crib mattress.  I have a waterproof mattress cover over the mattress with a crib sheet on top of it.  Then I put on ANOTHER waterproof mattress cover with a crib sheet on top of that.  I did this so that when Bean pees the bed in the middle of the night, I just take off the top two layers and she's ready to go back in her crib!)
 
I'm so excited to finally have all the tools and clutter cleared out of her room.  Finally, I can start sorting through all the baby gifts that are cluttering our dining room and put them where they belong in her room!  While I finished up working on setting the crib up and redoing the changing table, Steve re-did the closet.  Posts about those other projects to come soon!

Monday, June 10, 2013

Baby Productivity

This past weekend turned into a very productive baby weekend!  It wasn't in the plan for the weekend, but opportunities kept popping up that turned into baby weekend.

Saturday morning we decided to go to a neighborhood that promised a big garage sale.  We kept going back and forth on going (since we should have been working on the yard and preparing for vacation) but decided it wouldn't hurt to go check it out.  When we got to the neighborhood, we realized it was quite the deal.  There were traffic directors forcing the flow of traffic to do a one way loop through the neighborhood. We would find a spot, park, walk around a little, get back in the car, drive a little, find a new spot, & repeat.  We spent way too long there, but found some good baby deals!

While we were browsing the sales, we discovered baby clothes were a popular item.  After explaining to Steve how Bean will fit certain months at certain times of the year and what clothes to look for, we were on our way.  By the end of the sales, we'd spent less than $10 and got 8 outfits -- win!  In between sales, I realized that these clothes were the first items that we've bought for baby!  My mom has been buying things (since before I knew I was pregnant) and we've had friends send gifts, too; but this was the first things that we've specifically bought knowing our baby girl would wear them.  Pretty crazy!

(Clothes for Baby Bean!  It seems unreal that she will soon be wearing these clothes - they seem so big!  We chose items ranging from newborn to 6 months.  We are excited to meet her and see whether she'll be a little baby or a big baby!)

Saturday night, we decided it was time to go through all the nursery decor options we'd found online and finally pick a set.  We started with over 20 options and kept weeding it down.  Our system involved a spread sheet with all the links (and comments added by both of us).  Then one at a time, we'd go through and rank the options separately (we'd hide each others' ranks so we could rank freely).  We'd then go through the list together and axe all the lower ranked options.  Most of the time my top picks were Steve's lower picks and vice versa.

At the end of the night, we stopped with a "top 5 list".  Right before heading to bed, Steve found one of our middle picks (remember, my #1 was his #5, so the middle picks were our compromises) on a craigslist ad.  He sent an inquiry email and we headed to bed.  The next morning, we discovered that the Pottery Barn set we could compromise on was for sale in Cincinnati for a great price!  After church, we ate a quick lunch then headed to Cincinnati to pick up our new bedding!

We felt out of place pulling up in Ruby (our old Honda) to a house that we estimated was easily $400,000 - haha! After we made our purchase, we headed to celebrate at our favorite Cincinnati restaurant -- Dewey's Pizza!  After eating, we hit our other favorite Cincinnati spot - Ikea - where we went baby crazy!  We found some bird pictures, decals, a shelf, and a new light for the nursery.  We got great deals on it all and feel like after painting the nursery, we are set with the decor!

(Nursery decor!  The theme is birds -- have I told you how much Steve loves birds?!  The Pottery Barn bedding set we bought came with bumper pad, quilt, crib skirt, 2 crib sheets.  Brand new would have been $350+, we got it for $120 in great condition!  And check out that Bird picture we bought from Ikea.  Matches the set perfectly! We also have other little bird photos that match, but you'll have to wait for the nursery to be done to see everything!)

(Bonus photo: At 22 weeks - in this photo from last week - I'm looking the way I feel - very pregnant!)

Monday, March 25, 2013

Explanation of a Project

I realize my blog posts have been few and far between.  Today I went through a bunch of pictures on my phone and hopefully will have some more updates coming soon! For now, I'll start with the status of the last project I've been working on.

Back in December, remember all of my wallpaper removal?  Well that room is almost complete!  After all of the help we got from Steve's family, Steve and I were left the task of sanding some of the baseboards, and priming the walls.  About a month ago, we did just that!

  
(Steve did all the rolling, while I painted the the edges with the paint brush.  I didn't tape any of the trim off because we'll repaint all the trim later on.)

(So for now, the room is going sit as is with white barren walls.)

(It's amazing how much this room has changed and how bigger it looks now that it's all uniform with its white walls.  I'm excited to finally see the finished project, but for now it's finished for awhile.)


When I first started this project, I knew what this room would potentially be used for, but I didn't know the time frame of when it would be used.  But now I know!  Steve and I are thrilled to announce that our new Nursery will be used sometime around October 6th!  This has been a crazy hard secret to keep, but we're finally comfortable sharing that we're expecting a little one this fall!  Once we know whether baby is a boy or a girl, we'll make the decision on what color to paint the nursery.  

And for all of those doing the math and realizing I helped prime when I was pregnant, have no fear.  I did research on getting the best paint and also wore a heavy duty respirator.  I plan on doing some more painting in the next few months and will take the same precautions, so I don't want to hear it :-P.